BBC Placa Micro:Bit - Controlador con cable
  • Out-of-Stock
BBC Placa Micro:Bit - Controlador con cable

BBC Micro:Bit board

€24.80 Tax included
Out-of-Stock

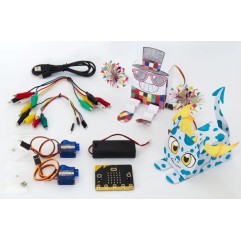
BBC Kit Micro:Bit V2 - Controlador Micro Bit

Te quedan 120€ para el envío gratis


24h Delivery


FREE for orders over 120€


Secure payment

Somos de confianza:
  • visa
  • mastercard
  • maestro
  • paypal
  • bizum

Información del producto

BBC MICRO:BIT CONTROLLER FEATURE V2.2

  • Controller: Micro:bit
  • Micro:bit Version: v2.2
  • Micro:bit Go Kit includes:
    • Micro:bit v2.2 Board
    • 6'' Micro USB Cable
    • AAA Battery Holder
    • 2 AAA Batteries
  • Processor: Nordic nRF52833
    • Core: Arm Cortex-M4 32-bit processor with FPU
    • Flash ROM: 512 KB
    • RAM: 128 KB
    • Speed: 64 MHz
    • Debug: SWD, J-Link/OB
  • Features (click on Downloads "More info MicroBit v2" to learn more about the board's sensors):
    • MEMS Microphone
    • 25 LEDs
    • Speaker
    • Touch Sensor
    • Led Display and Light Sensor
    • Buttons
    • GPIO Pins
    • 3V Power Pin
    • Ground Pin (GND)
    • Bluetooth Radio and Antenna
    • Processor and Temperature Sensor
    • Compass
    • Accelerometer
    • Micro USB Connector
    • Reset Button
  • Card Size: 4 x 5 cm
  • Programmable with: MakeCode, JavaScript, Python, Scratch
  • Free micro:bit App: Compatible with iOS and Android.
  • European Union Certification: Yes
  • Brand: BBC Micro:bit

MICRO:BIT CONTROLLER USAGE AND APPLICATIONS

What is the BBC Micro:bit v2 board?

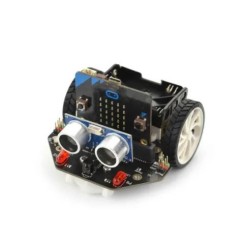
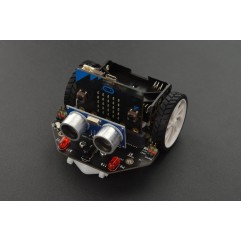
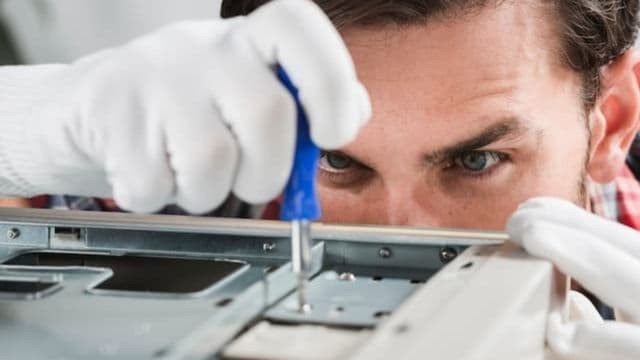
The micro:bit board is known as a pocket-sized computer where software and hardware work together.

As we've read in its features, it includes an LED light display, buttons, sound playback and detection, sensors, and many input/output functions that can be programmed and interacted with physically.

Before acquiring the board, you can perform basic exercises for beginners. Click here. These exercises aim to help you analyze the board and see its potential.

What is the Micro:bit board used for?

Micro:bit is primarily designed for beginners. You can create various projects with micro:bit, from an alarm clock to playing rock-paper-scissors or knowing when your plant needs water.

Its main purpose, however, is education. The board helps you understand how computers work. When you interact with your laptop or touch your phone's screen, you are using an input device. Inputs allow computers to detect things happening in the real world and make things happen, like displaying something on the screen or playing music. The processor plays a crucial role between input and output.

If you are an educator, some notable benefits of using this board in the classroom include:

  • Developing fluency in computer system concepts and languages.
  • Fostering creativity by encouraging students to make connections between abstract ideas and real-world outcomes, working with software and hardware: designing, building, prototyping, iterating, and learning from mistakes.
  • Enhancing critical thinking and collaboration skills.
  • Building individuals' capacity and confidence to develop, share, and bring ideas to life.
  • Physical computing combines Computational Thinking, Coding, Creativity, and Innovation.

How to use the BBC Micro:bit controller?

For the first use of Micro:bit, you need:

  • A micro:bit board
  • 2 AAA batteries
  • A computer, phone, or tablet with internet access to load code editors like Microsoft MakeCode or Python
  • USB cable if using a computer
  • For projects: additional components like crocodile clips, conductive materials, headphones, paper clips... it depends on the project!

How to take your first steps with Micro:bit?

It's very simple, you'll need as mentioned:

  • Either a computer with a browser and internet access
  • Or a phone and tablet. Whether iOS or Android, you'll find a free micro:bit app

To connect your micro:bit, you can:

  • If you've chosen a computer: connect the cable from your computer's USB port to the micro:bit's micro USB port
  • Bluetooth can also be used for wireless functionality.

The program transfer to the micro:bit is called flashing because it copies the program to the micro:bit's flash memory. Micro:bit will pause, and the yellow LED on the back will blink while the program is being transferred. Once copied, it can start running.

You can transfer your program from your computer:

  • Drag and drop. It's like copying a downloaded file from your computer to a USB drive. It will appear as a USB drive named MICROBIT. Then download the program as a .hex file from the code editor to your computer. It usually goes to the downloads folder. Then drag and drop the .hex file into the MICROBIT drive. When you transfer the .hex file to the MICROBIT drive, it will disconnect and reconnect as the micro:bit resets. In reality, micro:bit is not a flash storage device, but the computer will display it that way to facilitate .hex file transfer.
  • With direct flashing, send your program from the code editor directly to your micro:bit. With this method, you can send programs directly from online code editors to your micro:bit without downloading and copying a .hex file. It's quick and easy. You should use a webUSB-supporting browser like Edge or Chrome.

You can send programs directly from online code editors to your micro:bit without downloading and copying a .hex file. This is easy and fast. The downside of this method is that it doesn't save a copy on your computer, so if you're a student being evaluated, it's essential to download and save a .hex file when you've completed your project.

  • Transfer from the mobile app. Whether iOS or Android, you can download the free app (here is its guide) and simply follow the on-screen instructions. Remember that micro:bit uses Bluetooth, so you must enable it on your mobile or tablet.

Here's a video from the micro:bit team (you can enable Spanish subtitles by selecting them in the settings):

Click here to see the official micro:bit steps.

What can I use to code with Micro:bit?

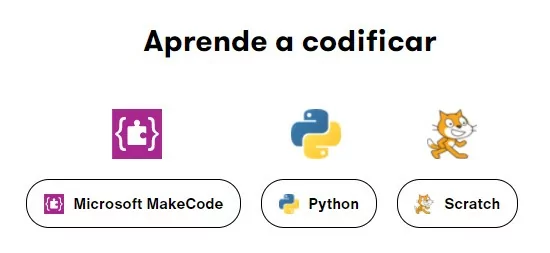
You can use different platforms: MakeCode, JavaScript, Python, Scratch

Coding

Frequently Asked Questions about the BBC Micro:Bit controller

What is the BBC Micro:Bit v2 controller? The BBC Micro:Bit v2 controller is a programmable board used to create electronic projects. It features a 16 MHz ARM Cortex-M0 processor, 256 KB of flash memory, 16 KB of RAM, and a set of integrated sensors and actuators.

What are the differences between the BBC Micro:Bit v1 and v2 controllers? The BBC Micro:Bit v2 controller has several improvements over the v1, including:

  • A faster processor (16 MHz compared to 10 MHz)
  • More memory (256 KB compared to 160 KB)
  • A more comprehensive set of sensors and actuators
  • A simpler programming interface

The BBC Micro:Bit v2 controller has the following integrated sensors and actuators:

  • Accelerometer
  • Compass
  • Gyroscope
  • Light Sensor
  • Temperature Sensor
  • Speaker
  • GPIO Ports

How is the BBC Micro:Bit v2 controller programmed? The BBC Micro:Bit v2 controller can be programmed using various methods, including:

  • The MakeCode block editor
  • The Python programming language
  • The C programming language

What projects can be created with the BBC Micro:Bit v2 controller? With the BBC Micro:Bit v2 controller, a wide variety of electronic projects can be created, including:

  • Games
  • Applications
  • Control devices
  • Robots
  • Internet of Things (IoT) devices

How is the BBC Micro:Bit v2 controller connected to a computer? The BBC Micro:Bit v2 controller is connected to a computer using a USB cable. The USB connector is located in the upper right corner of the board.

microbitgo
Información adicional

You might also like

dsdsd

dsdsd

€69.95
  • Pack
  • Out-of-Stock

Más productos de Micro:bit

dsdsd

dsdsd

€69.95
  • Pack
  • Out-of-Stock